2022PyCharm安装教程(windows)专业版一键安装,永久使用!
本文将从 Python解释器安装到Pycharm专业版安装和破解插件等使用都进行了详细介绍,希望能够帮助到大家。
目录Python 3.10.2解释器安装在 PyCharm 2021.1.3开发工具安装在 PyCharm 中运行代码在 PyCharm加入破解插件
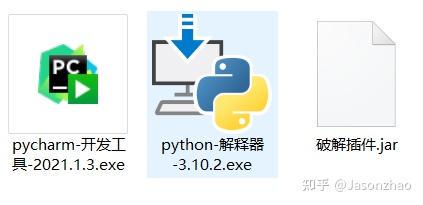
Python解释器&Pycharm安装包&Pycharm破解插件我都打包好了。直接点击下方卡片就可以前往获取了!
一、 Python 3.10.2解释器安装
本文假设读者熟悉 Python 开发,且计算机中已安装某个版本的 Python解释器,建议先卸载该版本。教程将使用 Python 3.10.2 版本,屏幕截图和 demo 均来自 Windows 系统。由于 PyCharm 可在所有主流平台上运行,读者在其他系统中会看到略微不同的 UI 元素,可能需要调整某些命令。
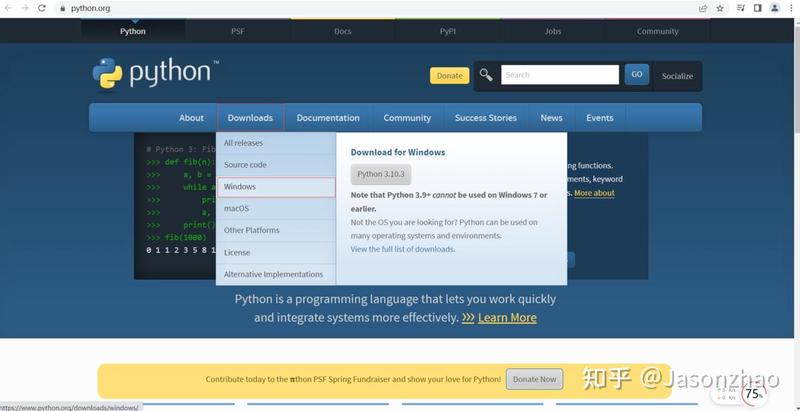
(1)首先安装在python 官网安装python环境(https://www.python.org/getit/)(2)选择Downloads--Windows点开,如图所示:
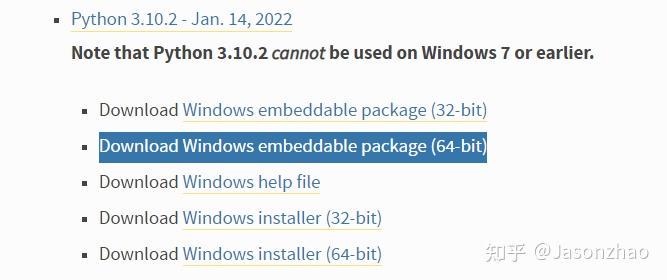
(3)点开之后,你会发现有很多python版本,我们当然要选择python 3.X版本,因为python 2.X版本官方已经不再维护了。但我也不建议大家选择最新的版本,因为很多第三库还没有兼容,所以可能会导致运行报错,在这里我们选择3.10.2.版本。点击** Windows embeddable package (64-bit)**下载链接。
(4)下载完毕后,我们点击开始安装。Python解释器我已经打包好了,懒得下载的可以跳过上述步骤,直接评论区留言获取!
直接点击下方卡片就可以前往获取了!
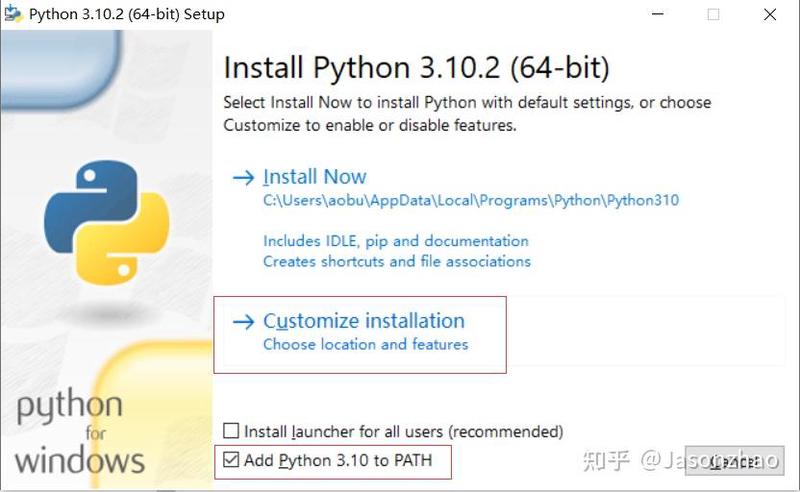
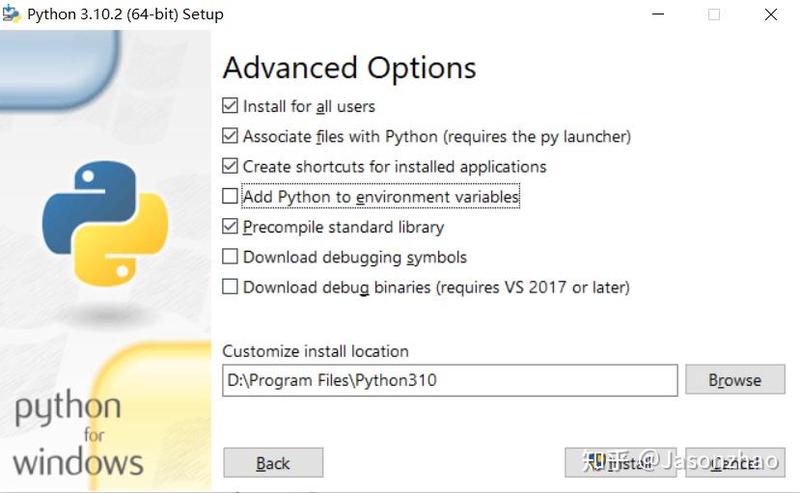
(5)这里请大家注意,这里一定要勾选Add PythonTo Path这个复选框,他会将python自动添加到环境中。
点击Custmize installation ,进行自定义安装操作。
(6)点击install for all users ,然后选择修改路径,我这里选择D盘。(我不建议大家选择C盘,因为在C盘的文件,有时候会需要管理员的权限。这可能会增加一些不必要的麻烦)
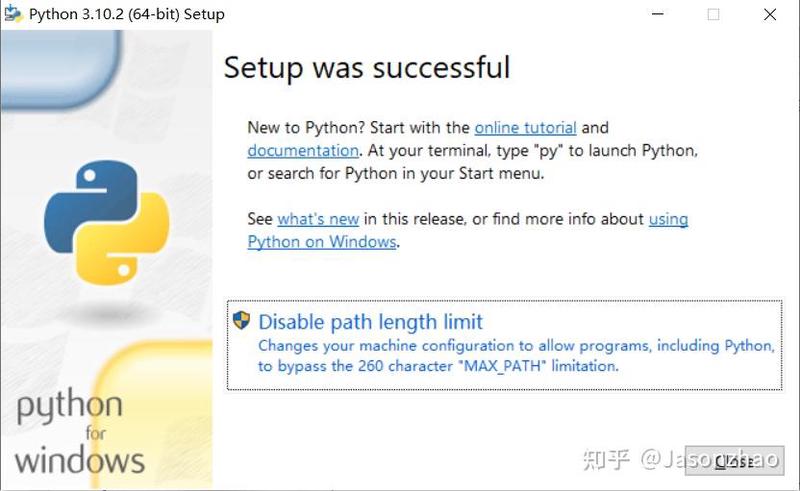
选择完毕后点击install,等待安装完毕。如果大家看到 Setup Was successful 这个标题的话,代表安装成功。
二、 PyCharm 2021.1.3开发工具安装
本文将使用 PyCharm Community Edition 2021.1 版本,该版本仅有30天免费且可在所有主流平台上使用。
为什么选择专业版?
用户其实是有3个版本的PyCharm可供选择使用,分别是社区版、专业版、教育版。其中社区版是免费的,但阉割了很多功能;专业版是付费的,功能完善,首年199美元,续费可打折;教育版是免费的,面向在校学生和教育工作者,需要有相关资质才能申请。
因此我们想要体验专业版本的Pycharm,且永久免费使用该怎么办呢?

别着急,本文带你白嫖所有安装包! PyCharm Community Edition 2021.1我已经下载打包好了,需要的评论区免费获取!
直接点击下方卡片就可以前往获取了!
接下来我们继续讲教程。
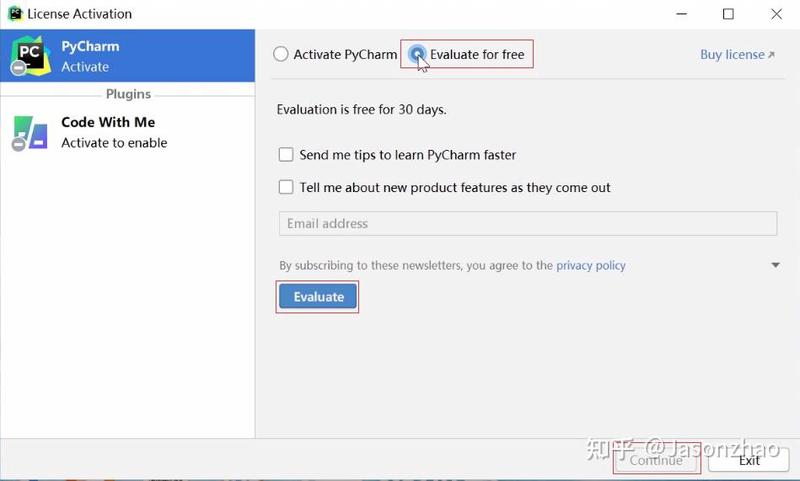
(1)我们点击开始安装PyCharm

(2)点击免费试用→试用→继续,就这样安装完成了。
注意啦如果你之前安装过该款软件,存在各种各样问题,请先卸载该款软件。使用我给你推荐的这款软件。Pycharm安装包&Pycharm破解插件我都打包好了,需要的评论区留言获取!
直接点击下方卡片就可以前往获取了!
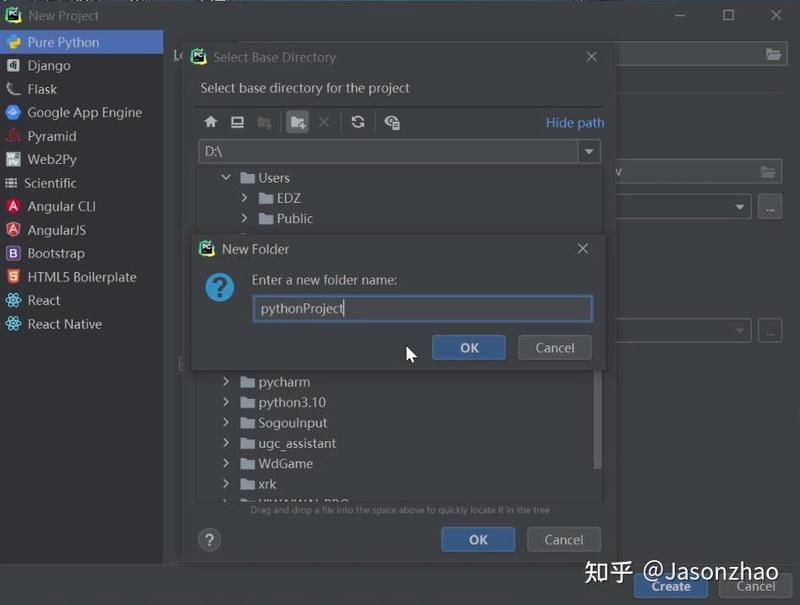
(3)打开Pycharm,新建项目。
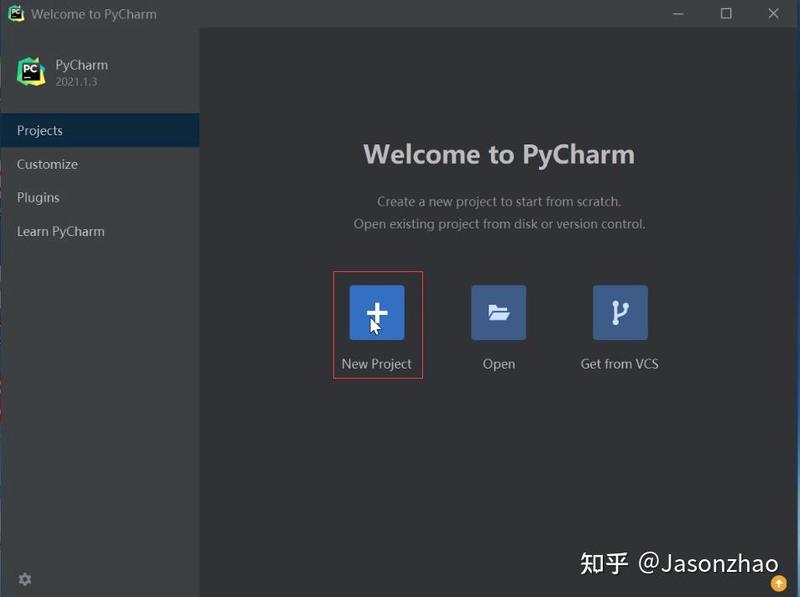
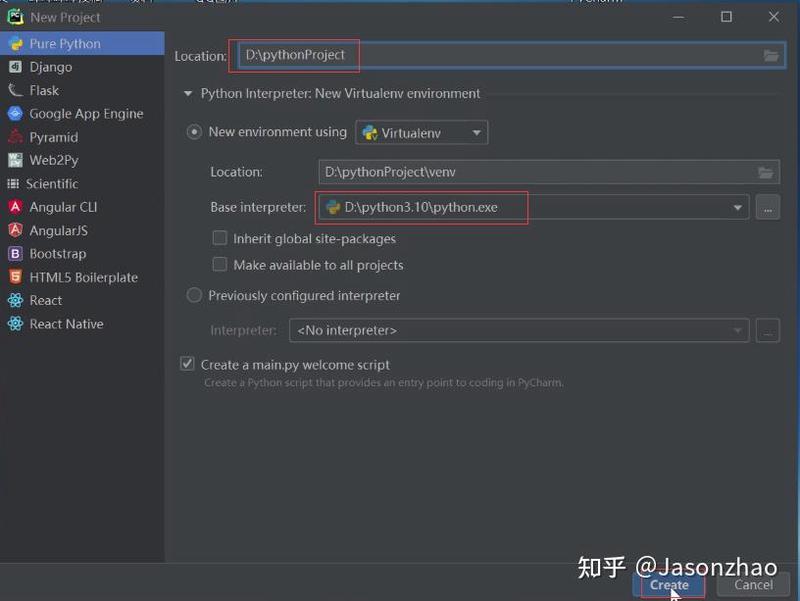
项目其实就是建一个工程或者文件,它默认是帮我们安装到C盘的,同样的我们还是自定义换个位置。在这里我们还是选择D盘,然后新建一个python project。
当上述步骤都完成后,因为我们之前已经安装好了解释器,下图中就可以看的python解释器自动加载到了P有charm里面了,最后直接点创建就好了。
就这样Python工程文件就已经建好了,可以看到下图自动帮我们生成了一段含有代码的界面。
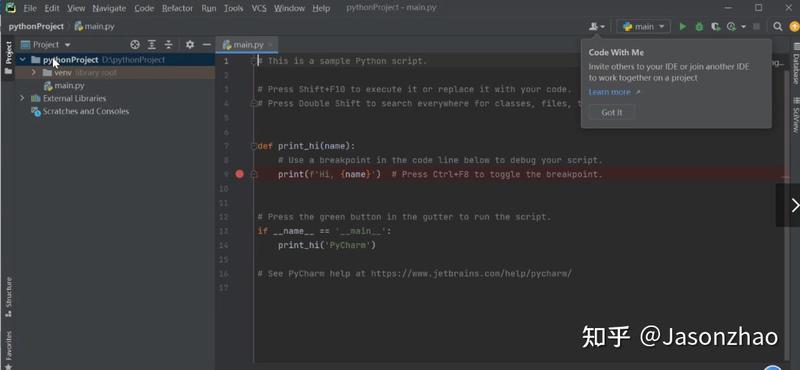
那我们要自己新建一个新的工程项目,开始写代码怎么办呢?别着急我们接着往下看。
三、在 PyCharm 中运行代码
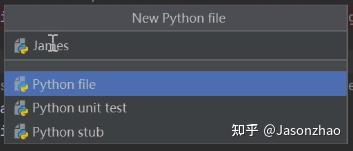
代码演示,测试运行鼠标移到PythonProject,右键New→Python Flie。
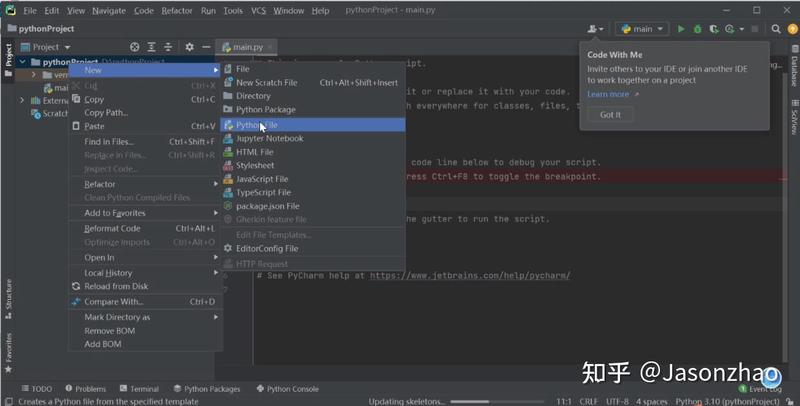
命名一个新的文件名称,我这里命名为James,然后点击下方Python flie。
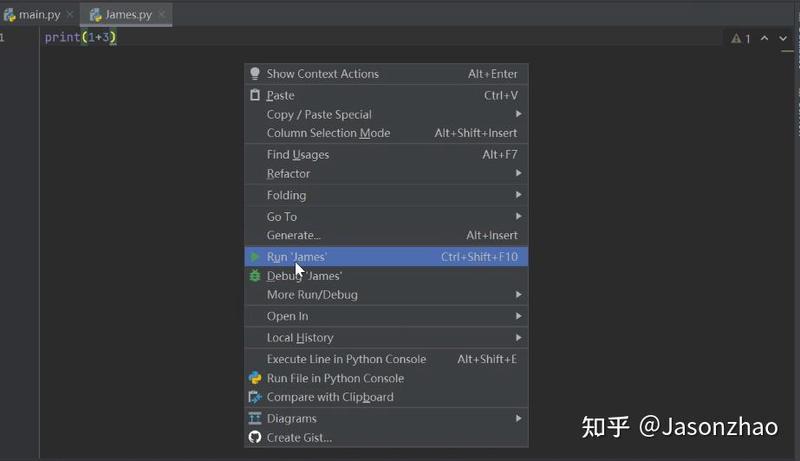
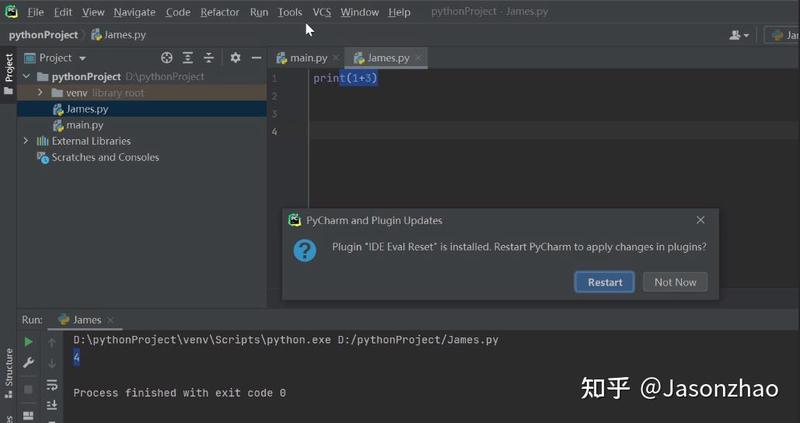
输入代码 Print (1+3)代码试运行,然后在空白处,右键选择 Run ''James",点击程序就可以运行了。
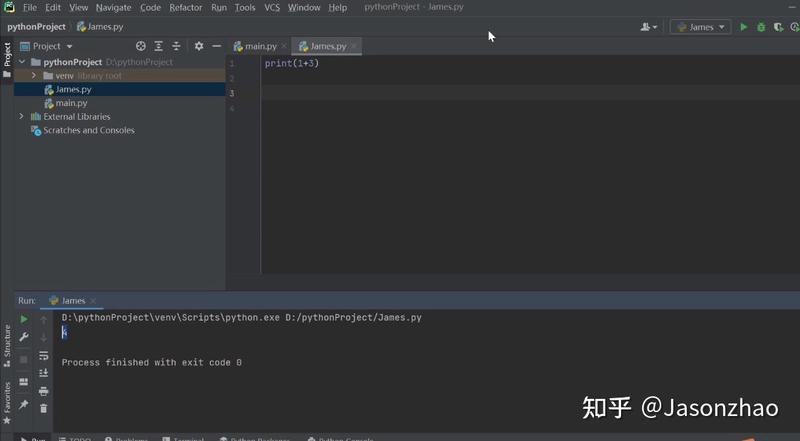
最后下方显示结果4,代码运行正常!
四、在 PyCharm加入破解插件
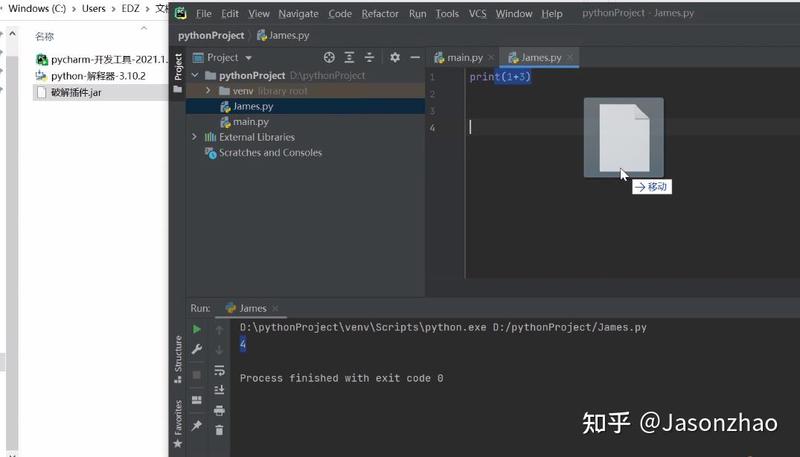
步骤进行到这里,我们环境都安装好了,但还是有个问题,我们使用的只是免费版本,没有破解和永久免费试用功能,怎么办呢?很简单,就在我们刚刚运行的代码界面,只需要将我们破解插件.jar移动到Pycharm代码区即可。
如果拖一次失败了,我们再试一次,可能加载需要一点点时间,直到出现下图页面,显示是否要重启,我们点击Restart,重启之后我们Pycharm就变成永久免费版本啦!
最后温馨提示,如果你之前安装的版本和我这里的版本不一样,请先将自己的解释器和开发工具卸载,统一装我下图给大家打包好的版本和插件,注意喔,没有破解插件你还是只能试用30天试用版喔!需要打包文件记得点击下方卡片前往获取喔!