PyCharm2023 中文版 JetBrains PyCharm-v2023.3.4 专业开发人员的Python IDE
分享模式:免费/绿色,按教程安装
PyCharm2023 中文版下载地址
https://pan.xunlei.com/s/VNsnPIxuSVNxgmzZ2pMdJYZBA1?pwd=sb73#
JetBrains PyCharm-2023中文激活版是适用于专业开发人员的Python IDE!PyCharm提供智能代码完成,代码检查,动态错误突出显示和快速修复,以及自动代码重构和丰富的导航功能。提供大量的工具,集成的调试器和测试运行器。Python探查器;内置终端;与主要的VCS和内置数据库工具集成;具有远程解释器的远程开发功能;集成的ssh终端;并与Docker和Vagrant集成。

最新版:JetBrains PyCharm 2023.3.4
安装使用教程:
关闭杀毒软件再解压(包括系统自带安全中心、第三方安全卫士/杀毒软件等)
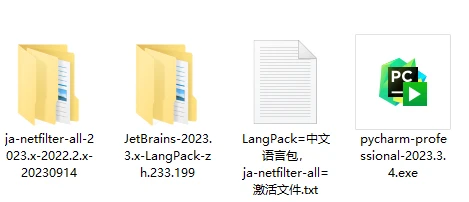
1、下载本软件,解压,得到如下文件和文件夹
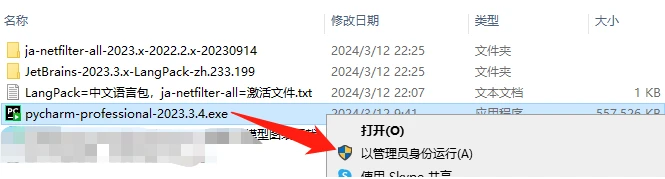
2、安装PyCharm主程序
2.1、以管理员身份运行pycharm-*.exe主程序,开始安装
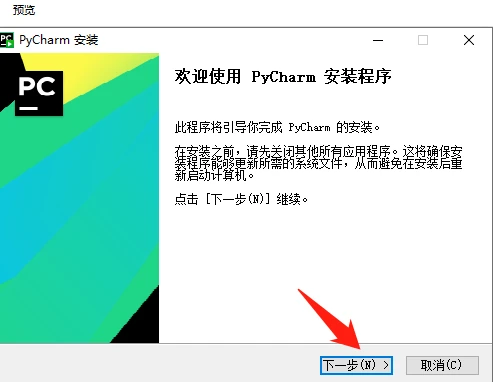
2.2、点击“下一步”
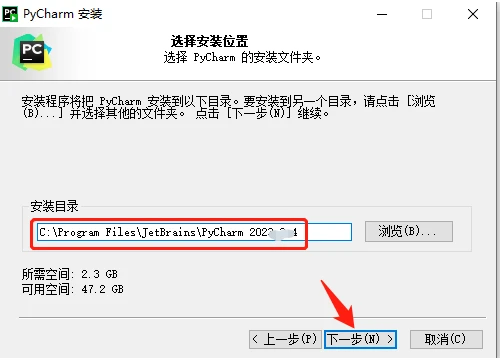
2.3、设置安装目录,点击“下一步”
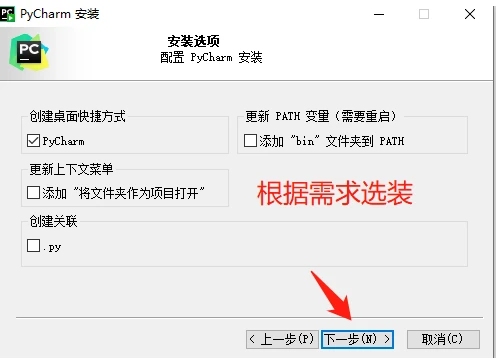
2.4、根据自己的需求选装,点击“下一步”
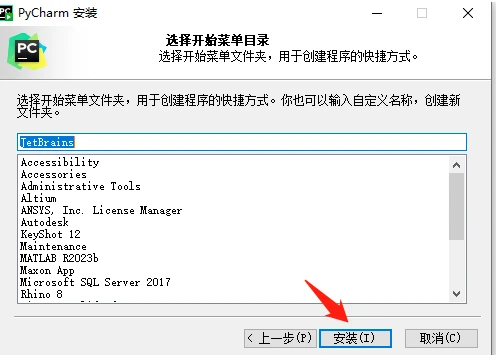
2.5、点击“安装”
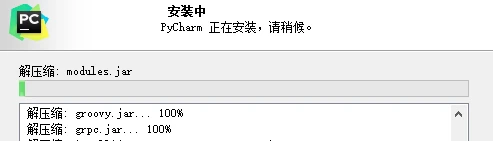
2.6、安装ing,稍等一会
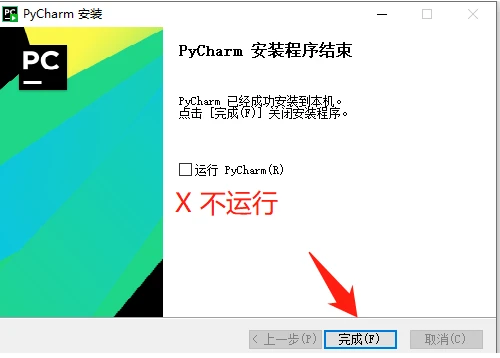
2.7、主程序安装完,不启动
3、PyCharm激活
3.1、进入已解压的ja-netfilter-all-***文件夹目录,复制“jetbra”文件夹,粘贴到C盘根目录
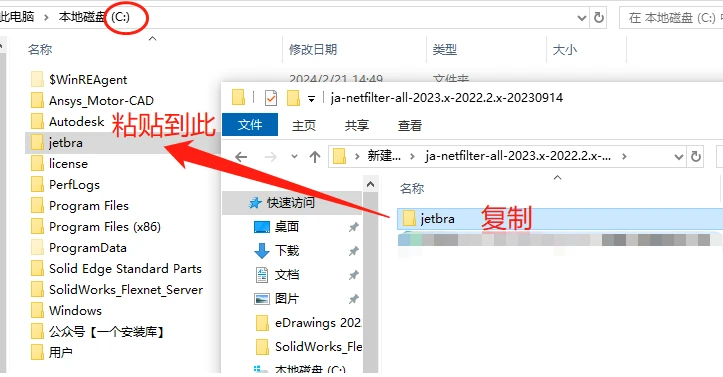
注意:此时,永久激活插件jetbra的位置就是C:jetbraja-netfilter.jar,不要随便移动或删除,否则...,你懂得!
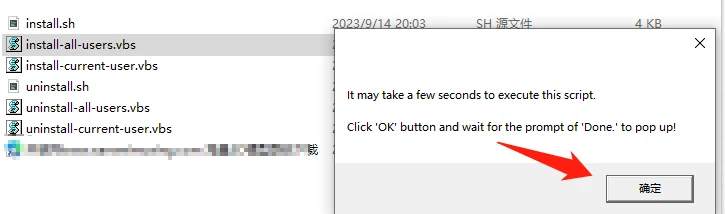
3.2、依次进入文件夹“C:jetbrascripts”,双击运行install-all-users.vbs 文件,出现提示,点击“确定”
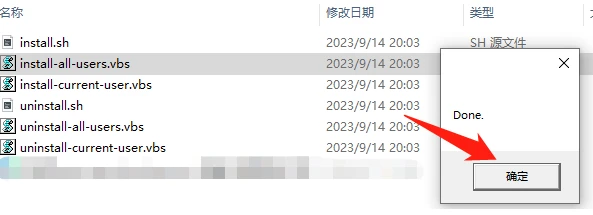
看到提示“Done”时(说明运行成功),点击“确定”。
(vbs文件执行过程中,需要大概10-30秒时间(也可能需要几分钟,时间不固定),必须要看到“Done”提示,再进行下一步!)
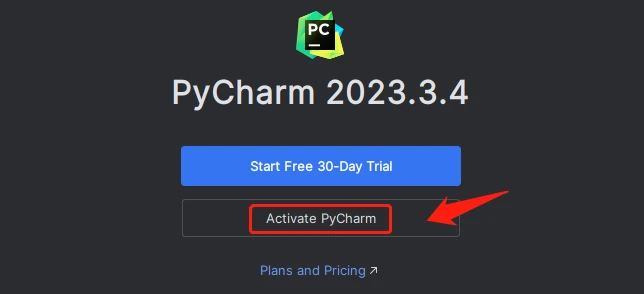
3.3、启动PyCharm软件首次启动会有如下提示,勾选同意,点击“Continue”,再点击Don’t Send


3.4、点击激活选项
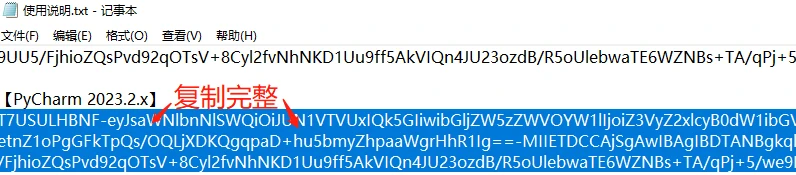
3.5、打开C:jetbra目录中的“使用说明.txt”,找到【PyCharm-2023.2.x】那一行,复制其激活码(一定要复制完整)
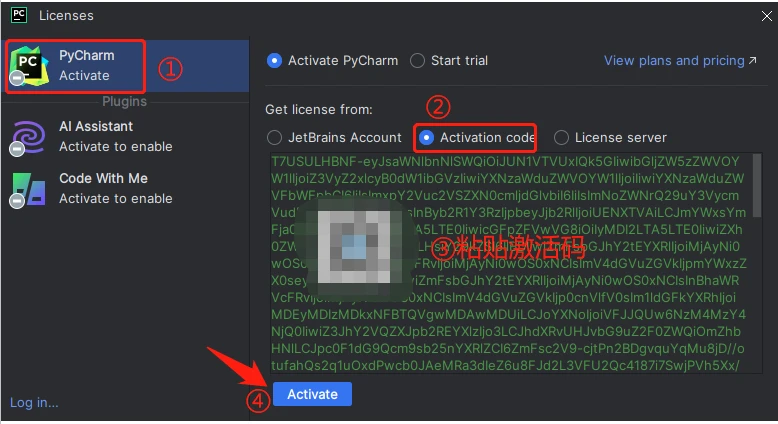
3.6、回到PyCharm软件激活界面,选择激活码方式(Activate code),将激活码粘贴到框内,点击“Activate”
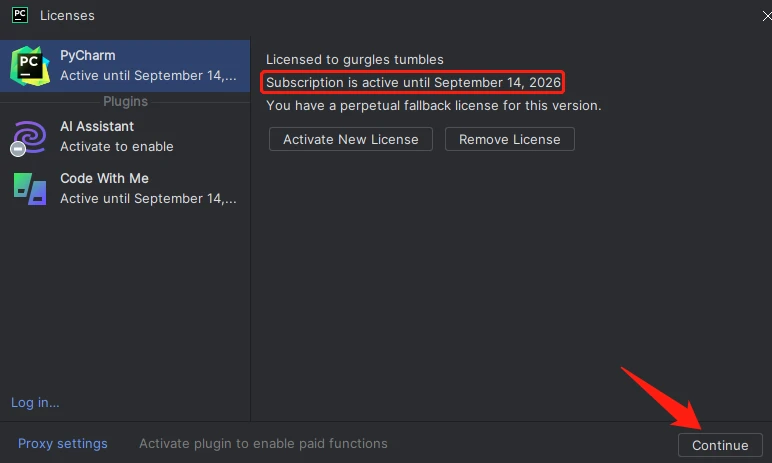
3.7、此时可以看到软件已经被激活(不用在意激活的时间,已经永久激活),点击“Continue”
4、PyCharm汉化成“简体中文”语言
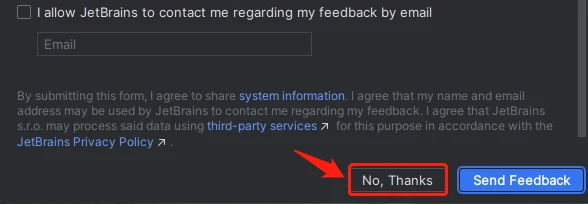
4.1、打开PyCharm软件,有此提示,点击“NO,Thanks”
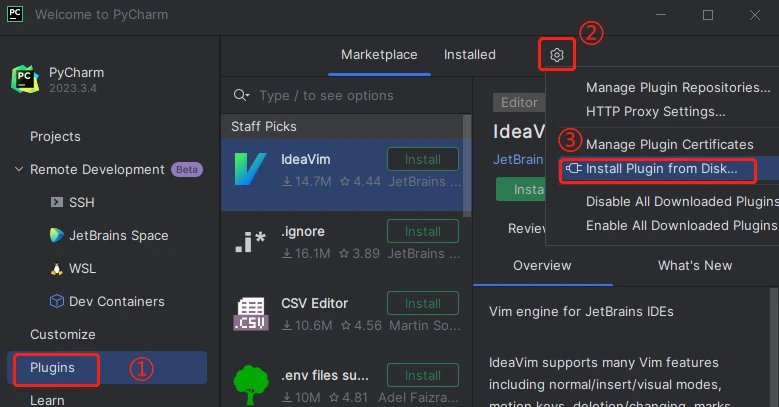
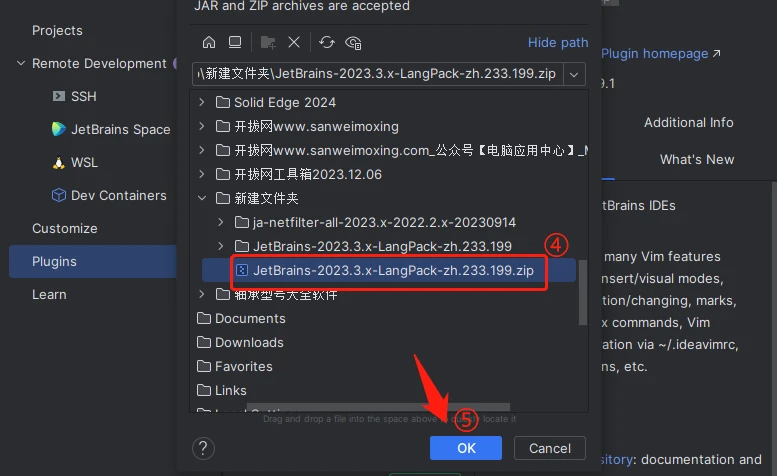
4.2、进入PyCharm界面,依次点击“插件-齿轮按钮-从本地磁盘安装”,选择安装包内的zip语言包“JetBrains-2023.*-LangPack-zh.*.*.zip”
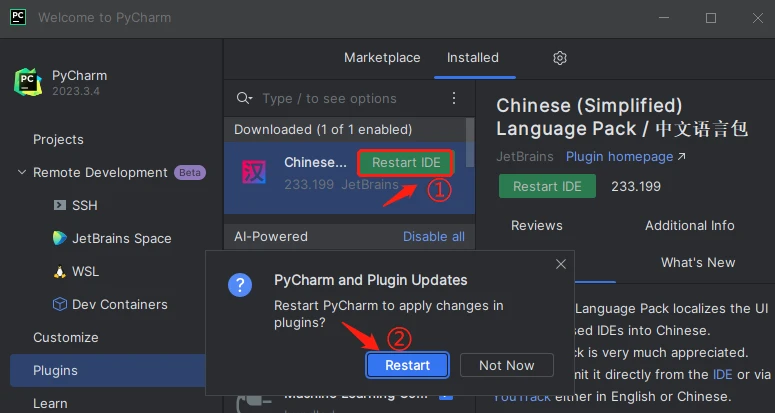
4.3、中文语言包安装成功,重启IDE
PyCharm重启后,就是中文语言界面,开始享受该软件带来的愉悦吧!