PHPStorm与WampServer配置笔记
PHPStorm与WampServer配置笔记
内容导读: 1.phpstorm安装与破解。 2.WampServer 安装 2.配置wampserver到PHPStorm。 3.PHPSTORM中配置PHP、XDebug、Apache 4.项目创建及运行
1.phpstorm安装与破解。
安装包会提供给大家。
安装过程比较简单:双击安装包后,一路next即可。注意安装完后以后不要启动。按下图方式进行详细配置。

以上截图中的激活码如下,请自行复制粘贴即可:
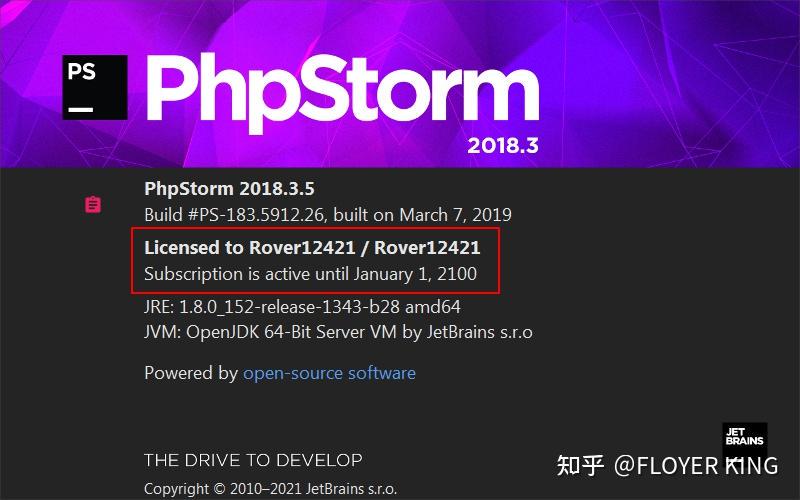
接下来,启动PHPSTROM,在欢迎页看到如下信息,表示破解激活成功。
至此,PHPSTORM开发环境安装破解完毕,但是还无法创建项目。接下来,需要配置PHP解释器及Web服务器等。
2.WampServer 安装、配置
2.1安装
双击拿到的wampserver3.2.0_x64.exe安装包进行安装。这里需要注意的是: 1.VC_redist.exe(有N多版本需要安装),如果安装过程中有提示,进行安装即可。如果不报错,一路向下安装即可。 2.在安装的选项中,勾选PHP7.3.12和MySQL 8.0(本课程使用的PHP解释器版本和数据库及版本)
简要说明WampServer安装完成后的文件夹情况:
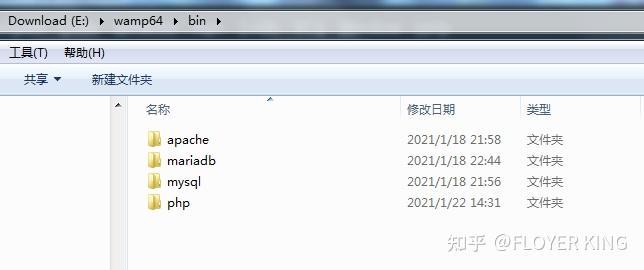
其中: apache 是Web服务器目录 mariadb是数据库 mysql也是数据库(可以在上节的托盘图标中切换具体使用的数据库)
php目录包含了所有指定的PHP版本文件(这里不再展开)
2.2PHP版本配置
包含两种配置:命令行和Web的PHP版本 (1)指定PHP CLI(指的是PHP CLI环境的版本),同时注册该版本的PHP.exe到系统环境变量。 (2)指定Apache中工作的PHP Web版本
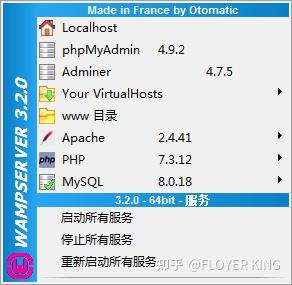
详见下图PHP CLI=7.3.12-WEB=7.3.1.2.
一些说明:PHP跨版本后,有许多的特征法证改变。CLI是Command Line(命令行下的执行),Web的PHP 服务于PHP,设置成一样是确保可视化背后的结果和CLI一致。
2.3MySQL版本指定
该数据库,大家都比较熟悉,不再赘述,只截图说明配置情况:
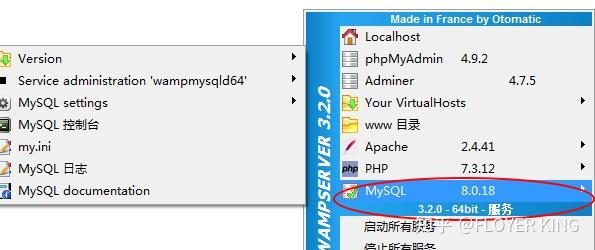
需要注意一点:本机之前如果有安装MySQL,会冲突。解决办法:关闭或卸载之前的MySQL服务为WampServer中的MySQL另外指定端口(默认3306)
2.4配置PHP XDebug
该部分包含三块内容:开启PHP环境对XDebug的支持。在对应版本的phpApache.ini、php.ini中修改(增加如下配置属性)开启wampserver后访问localhost.确认XDebug是否已经开启,及对应版本。
(1)开启XDebug的支持:
使用NotePad++编辑:{wamp64安装目录}\bin\apache\apache2.4.41\bin\php.ini文件,因为该文件是个链接符号文件(对于课程指定的PHP 7.3.12版本来说,实际上上述文件指向:{wamp64安装目录}\bin\php\php7.3.12\phpForApache.ini文件)
加入以下内容:
注意:其中第2行的内容不要动,复制3-13行内容即可。同时将以上内容复制到{wamp64安装目录}\bin\php\php7.3.12\php.ini文件的最下方即可。
(2)XDebug测试
在Wampserver服务启动的情况下,在本机浏览器中查看:http://localhost/?phpinfo=-1
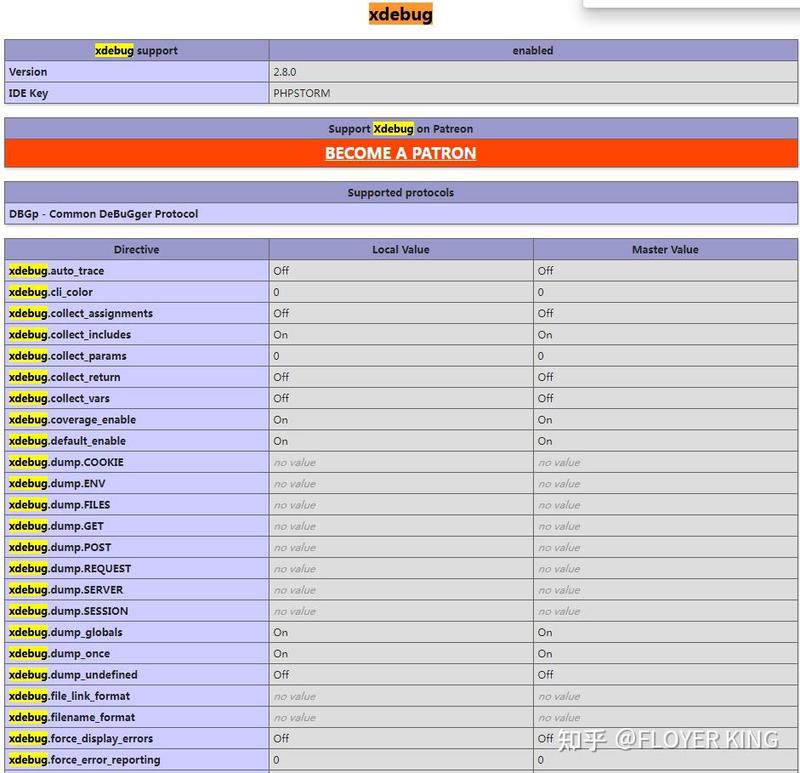
出现上述图片,即表示XDebug在Wampserver中配置成功
3.PHPSTORM中配置PHP、XDebug、Apache
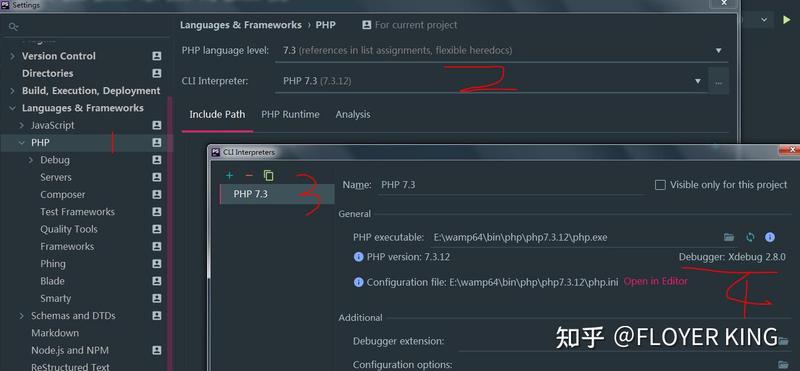
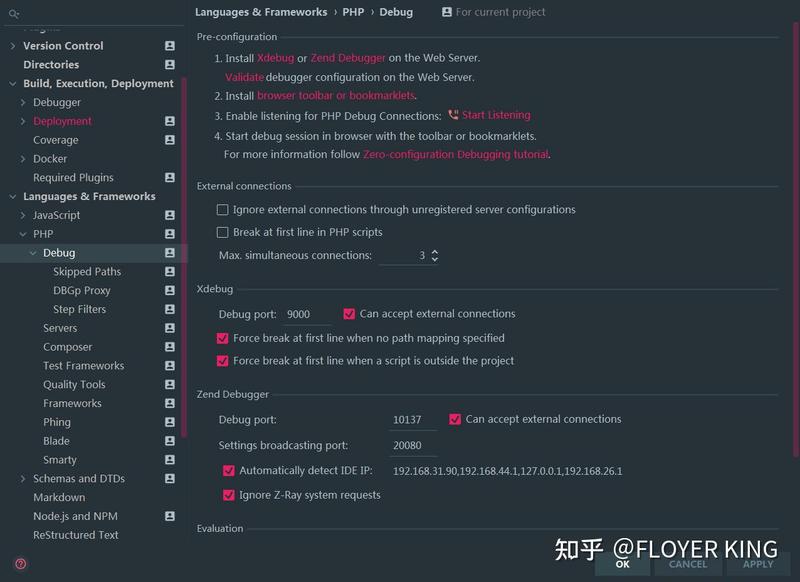
配置PHP 配置CLI的PHP版本及XDebug。如果XDebug不显示,说明Wampserver中配置不正确,关闭Wampserver,并检查配置。然后按下图中4部分上方的刷新按钮即可。
配置项目运行的Web服务器(内含指定到Web版本的PHP7.3.12)
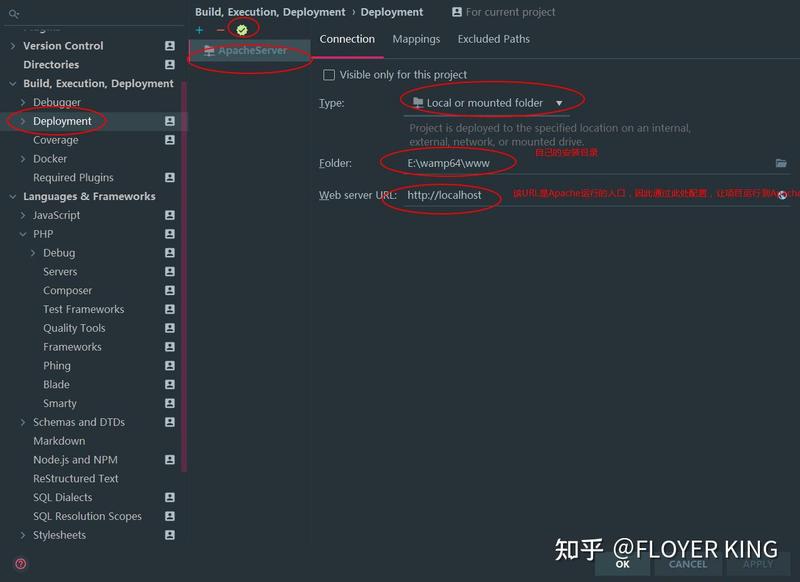
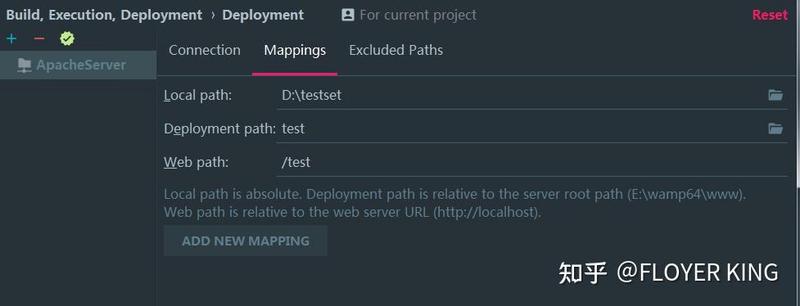
配置项目文件到服务器路径映射:
XDebug配置: 配置DBGP Proxy。注意IDE key 是2.4节中指定的IDEKEY,要保持一致,同时端口写9001.不是9000.如下图所示:
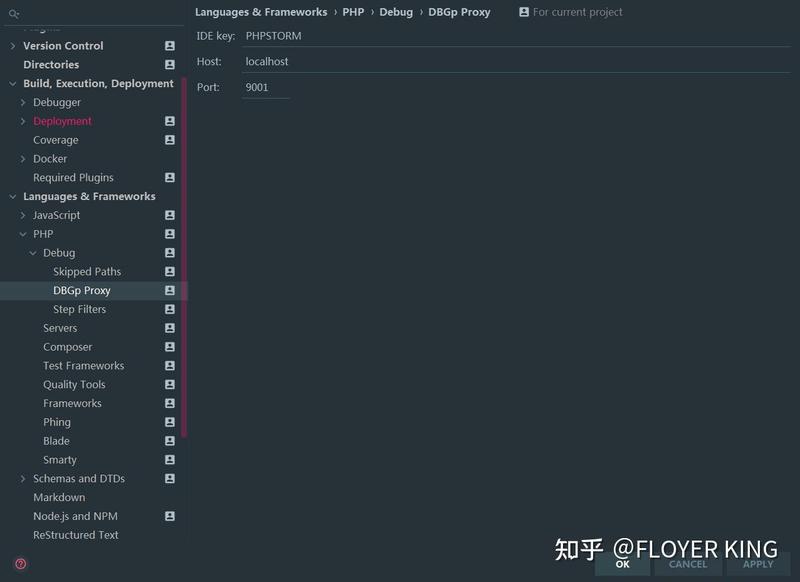
配置端口
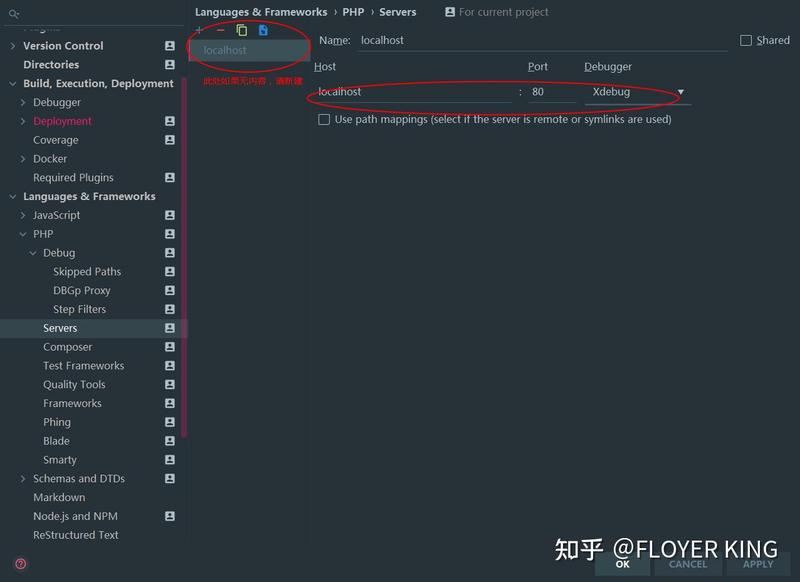
配置Server与XDebug关联
3.调试
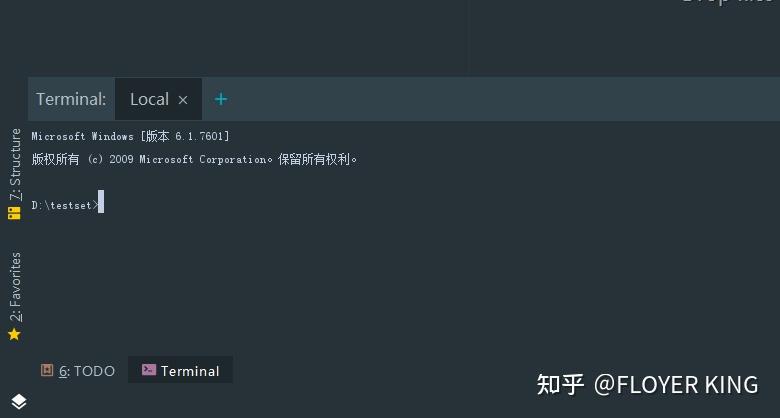
3.1在Terminal中调试
需要把PHP.exe配置到环境变量。否则可能无法解释PHP文件。影响此处使用
3.2Web浏览器调试配置:
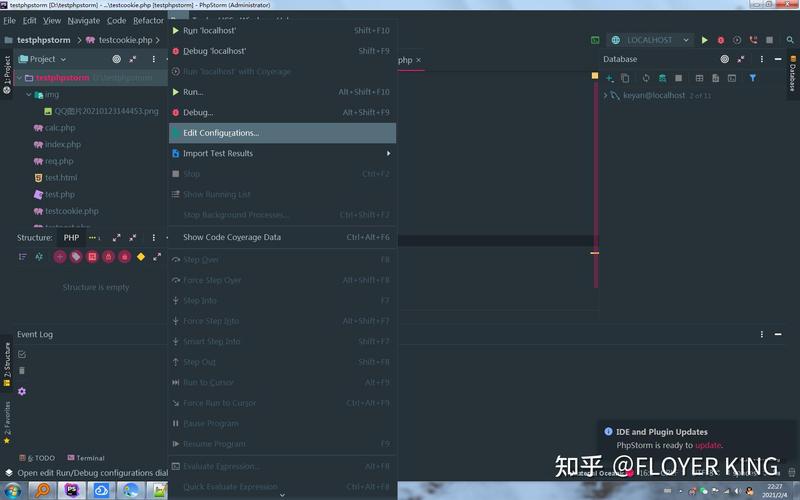
(1)调试路径指定:
选定PHP项目的单个文件,并点击下图配置:
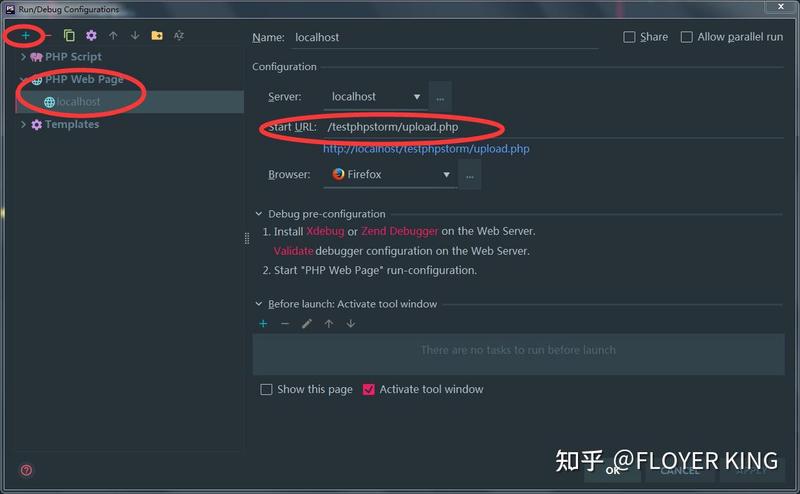
进入具体配置,并指定映射路径(这里必须要注意路径,记得和部署的路径保持一致,否则无法显示)
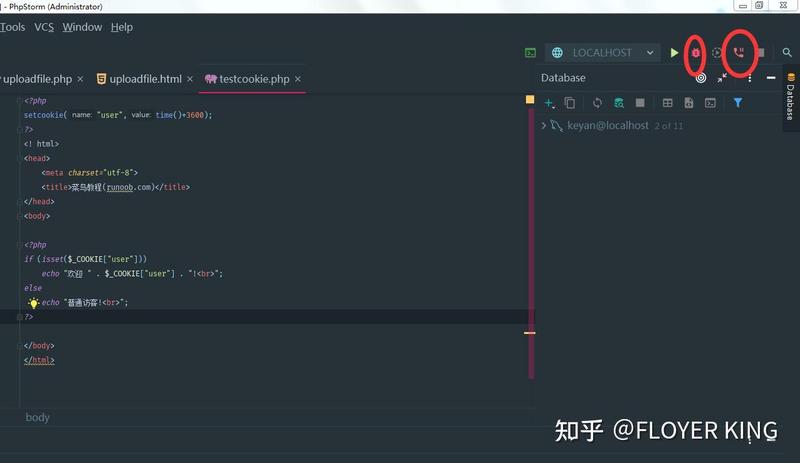
在Web调试时,需要开启调试监听功能。(记住需要调试时才开启,否则一直处于调试模式)
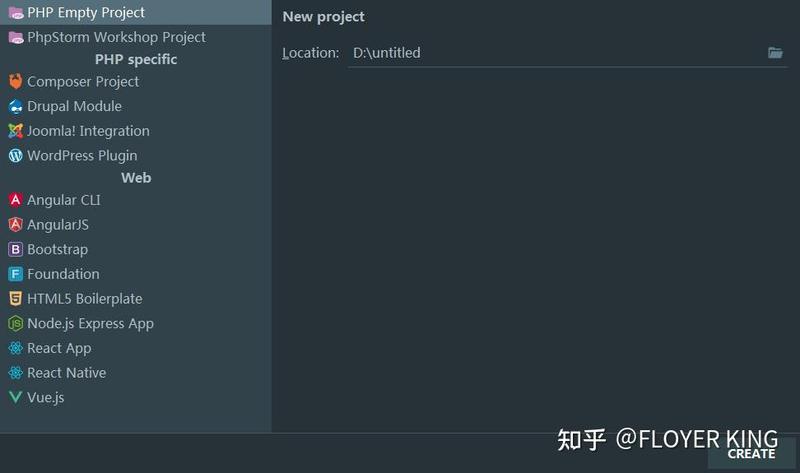
4.项目创建及运行
PHPSTORM-File-New Project 如下图所示,创建一个项目:
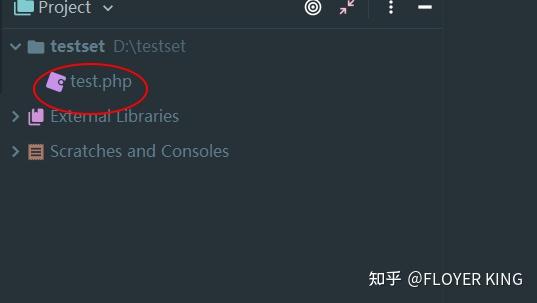
并添加一个文件,如下图所示:
项目运行:

结果运行失败
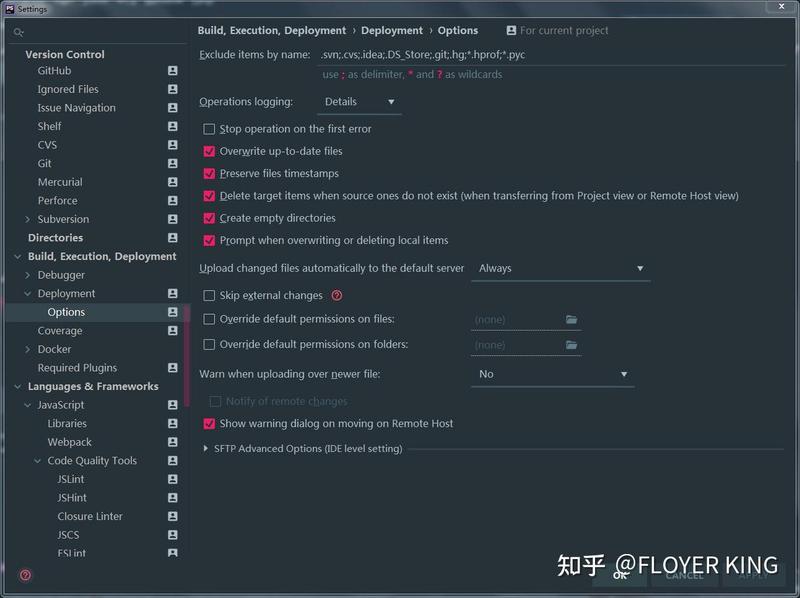
如何将修改后的文件自动上传到服务器?将项目文件自动拷贝到WebRoot。
修改文件后,控制台如果出现这样的log,表示OK。 [2021/2/4 22:36] Automatic upload [2021/2/4 22:36] Upload file 'D:\testphpstorm\testcookie.php' to 'E:\wamp64\www\testphpstorm\testcookie.php' [2021/2/4 22:36] Automatic upload completed in less than a minute: 1 file transferred (23.1 kbit/s) [2021/2/4 22:39] Automatic upload [2021/2/4 22:39] Upload file 'D:\testphpstorm\testcookie.php' to 'E:\wamp64\www\testphpstorm\testcookie.php' [2021/2/4 22:39] Automatic upload completed in less than a minute: 1 file transferred (11.5 kbit/s)
特别说明:以上是针对一个PHP项目的配置,如果新建项目,涉及到项目名的地方,记得要增加对应项目配置。这样才能有效的防止多个项目冲突问题。
新建项目,需要重新配置以上所有步骤。
水平有限且时间仓促,表述如有不合理、前后不是太统一的地方,欢迎大家指正,共同进步。