IntelliJ IDEA LicenseServer激活及使用
一、激活
IntelliJ IDEA下载地址:
https://www.jetbrains.com/idea/download/#section=windows
原文地址:http://blog.csdn.net/rickyit/article/details/51790069
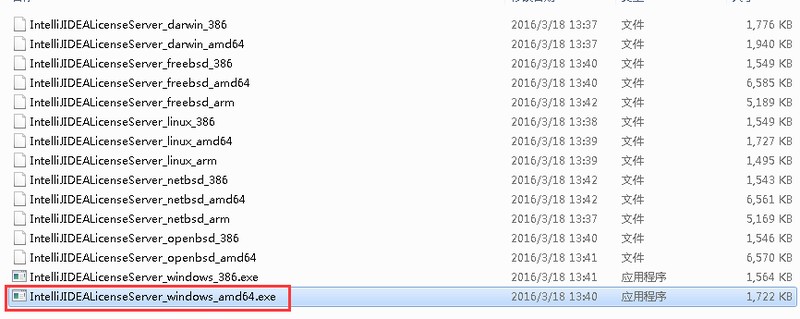
IntelliJ IDEA 是Java开发利器,用社区版不爽,干催就用旗舰版,这个是收费的,需要licence。 网上找到了一个帖子 http://blog.csdn.net/rickyit/article/details/50600723,可以通过服务器激活。 最近IntelliJ IDEA 16激活不了,架构师推荐了本地服务器激活。 压缩包地址: http://pan.baidu.com/s/1eRXm2zS 密码:orp9 1. 先不要启动IDEA,解压后点击IntelliJIDEALicenseServer_windows_amd64.exe ,我的是64位系统的。 32位点击IntelliJIDEALicenseServer_windows_386.exe
2. 启动服务,获取激活地址:http://127.0.0.1:1017

3. 输入本地服务器地址
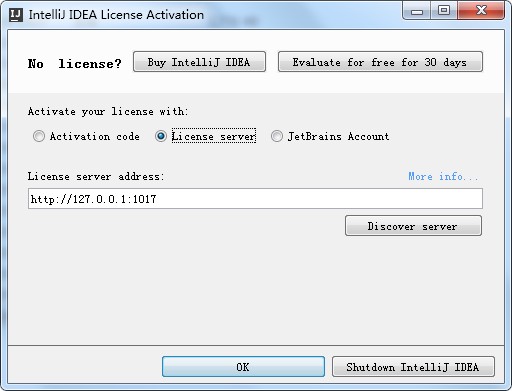
4. 激活成功

比较不爽的是每次启动IDEA都要先启动IntelliJIDEALicenseServer。可以参考http://www.win7u.com/jc/2676.html 把exe注册为服务。这样每次启动idea的时候就不用再点击exe了。

这里根据实际操作写了个博文,可以参考一下!实测有效!
二、创建Web项目
原文地址:http://blog.csdn.net/wo541075754/article/details/46348135
首先要理解一个概念:在IntelliJ IDEA中“new Project”相当于eclipse中的工作空间(Workspace),而“new Module”相当于eclipse中的工程(Project)。以下均采用Intellij的说法,请自行对照转换理解。
创建Project
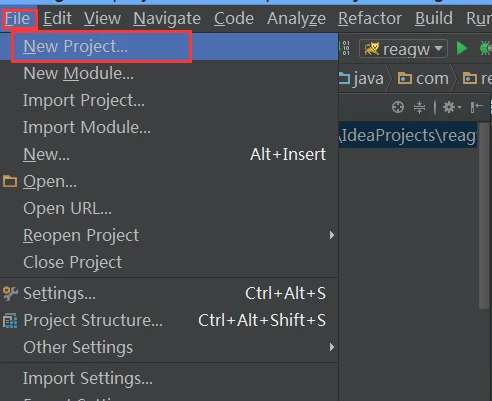
依次点击File–》new Project;
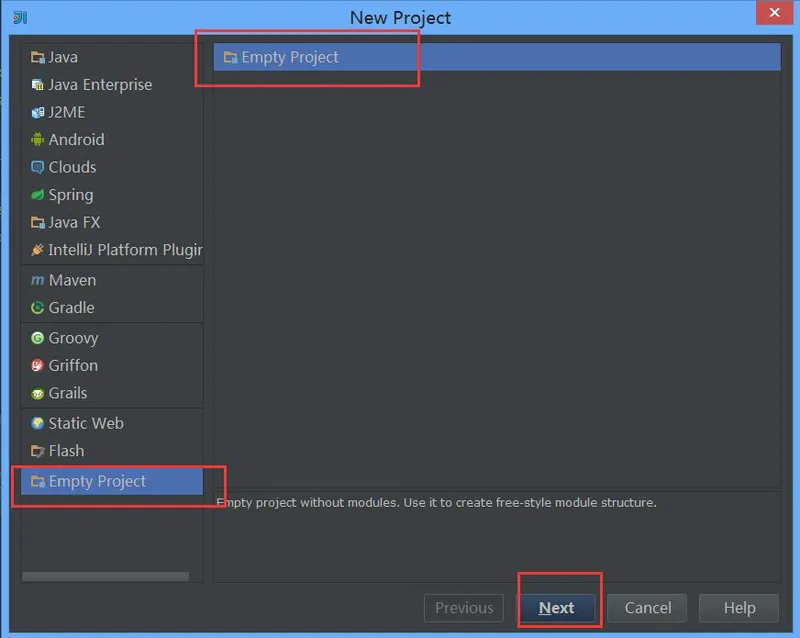
选择Empty Project项目,点击Next;
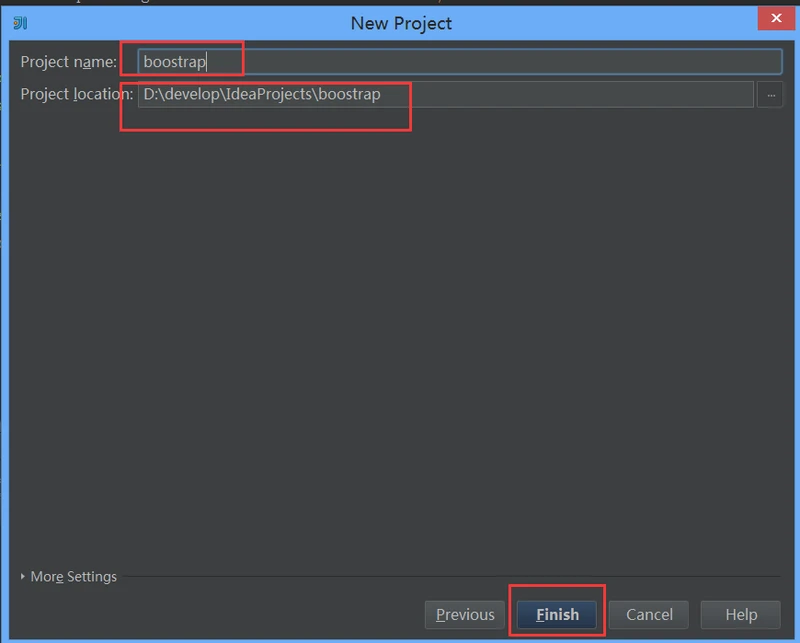
输入项目名称,选择项目路径;
创建Module
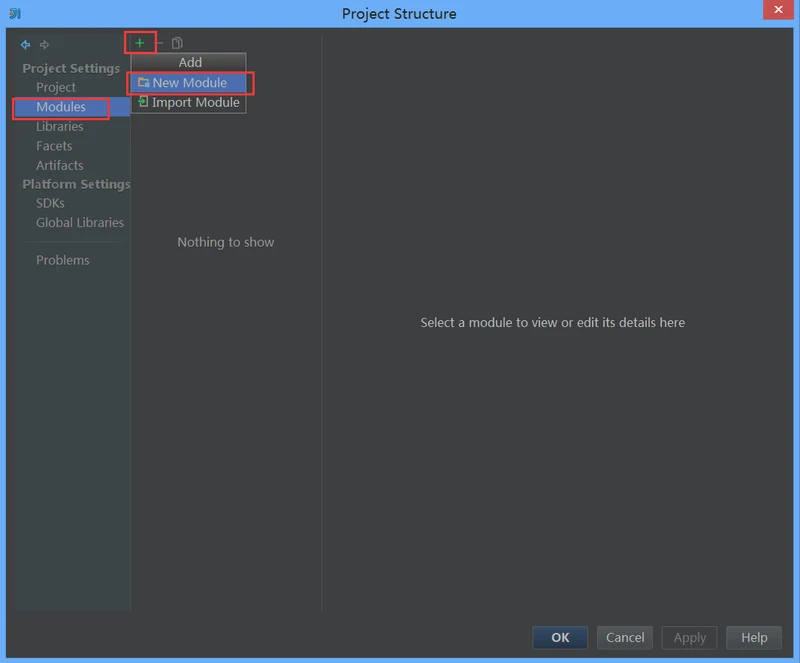
点击Finish,弹出下面窗口,Intellij默认选择Modules,点击加号,选择New Module;
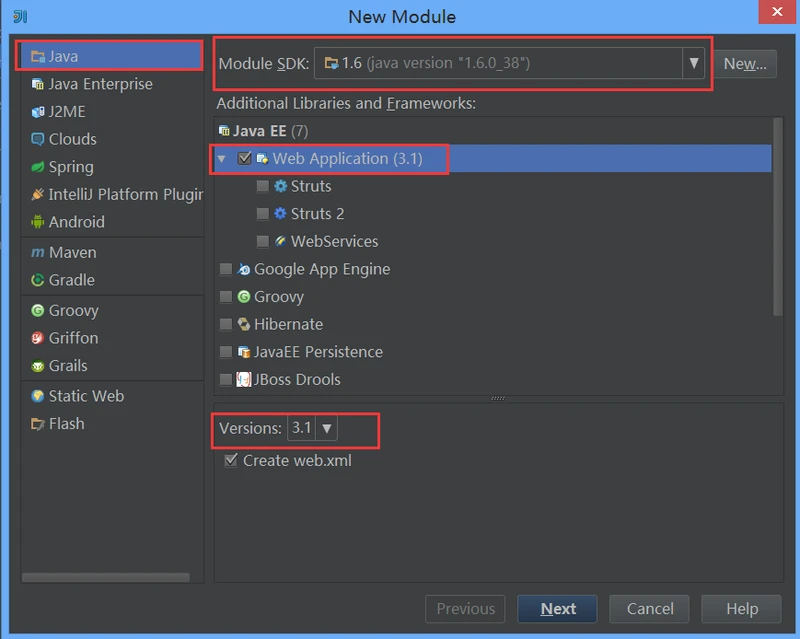
选择Java,配置Module SDK,选择Web Application,配置Versions,点击Next;
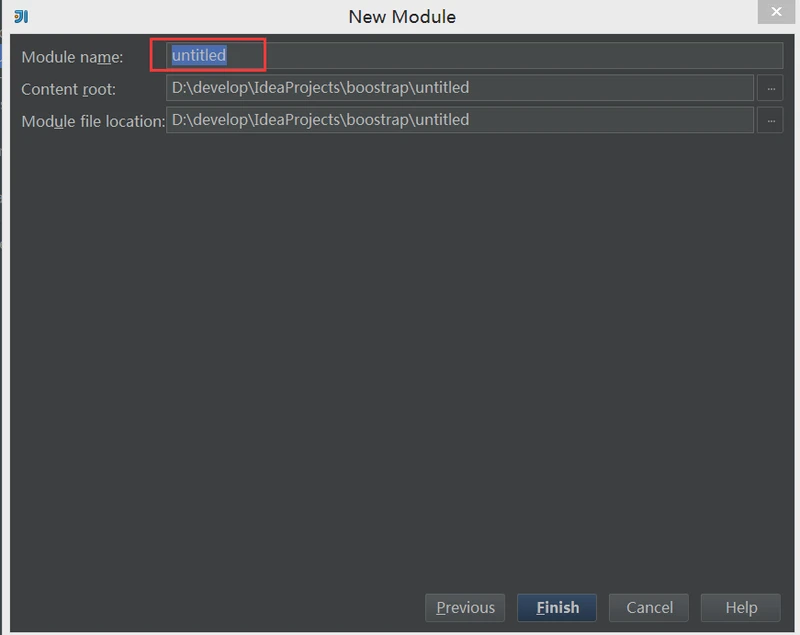
输入Module Name,点击Finish。
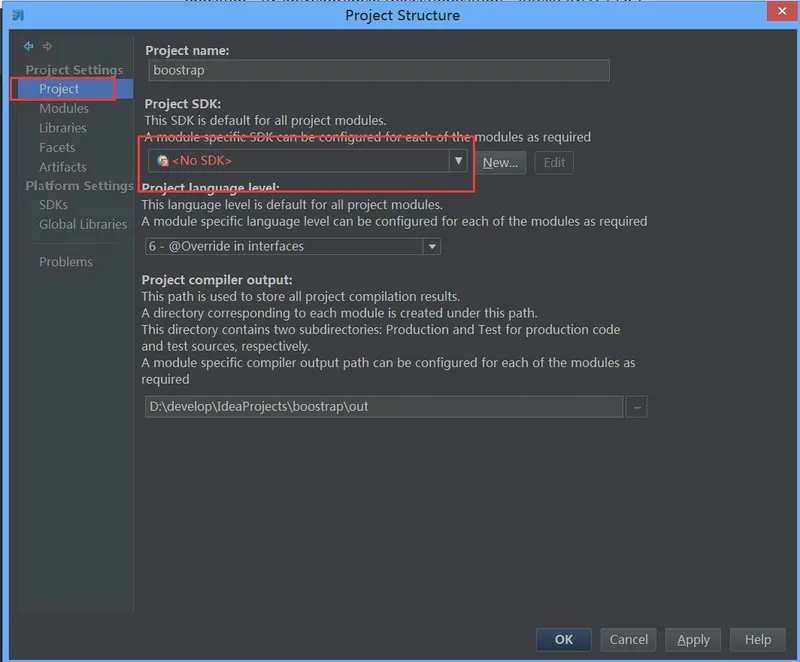
选择Project,配置SDK;
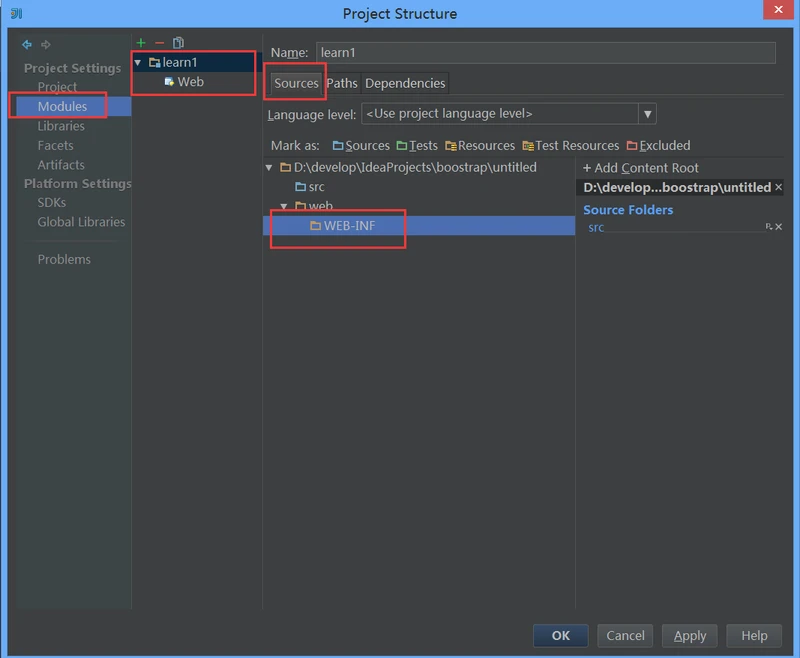
选择Modules–》learn1(Modules名称)–》Sources–》web–》WEB-INF;
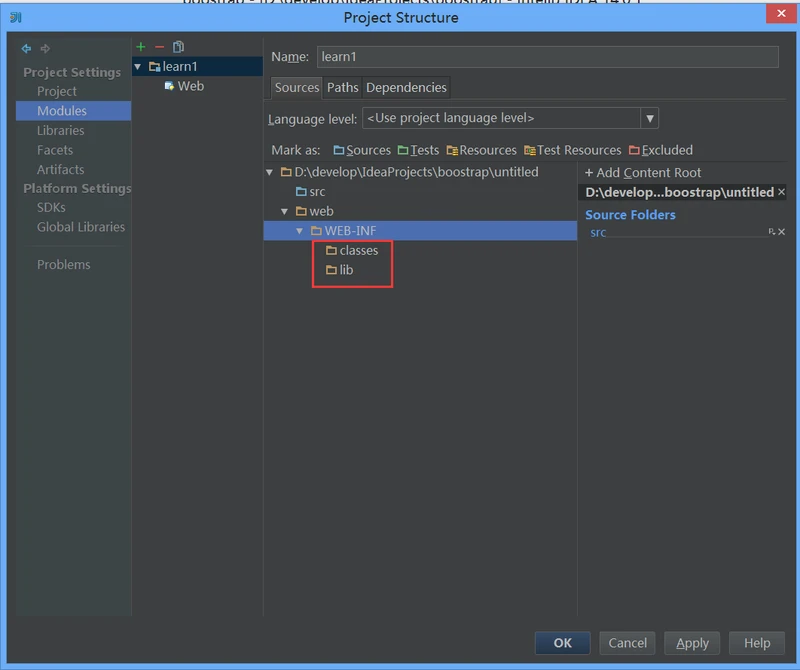
右击WEB-INF,依次new folder,创建classes目录和lib目录;
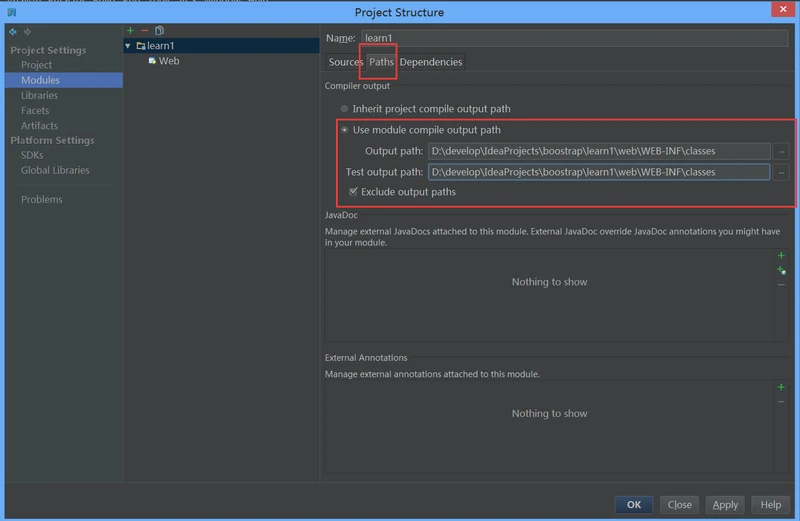
选择Paths,选择Use Modules complie Output path,指定路径为上面创建的classes目录;
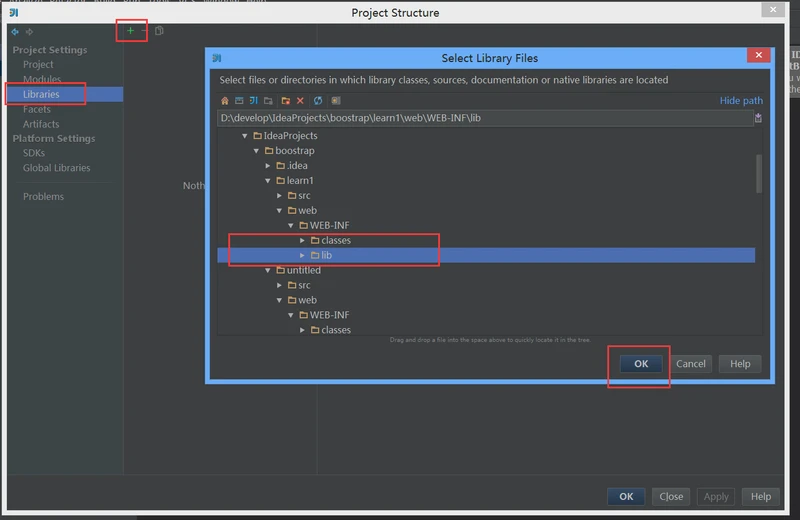
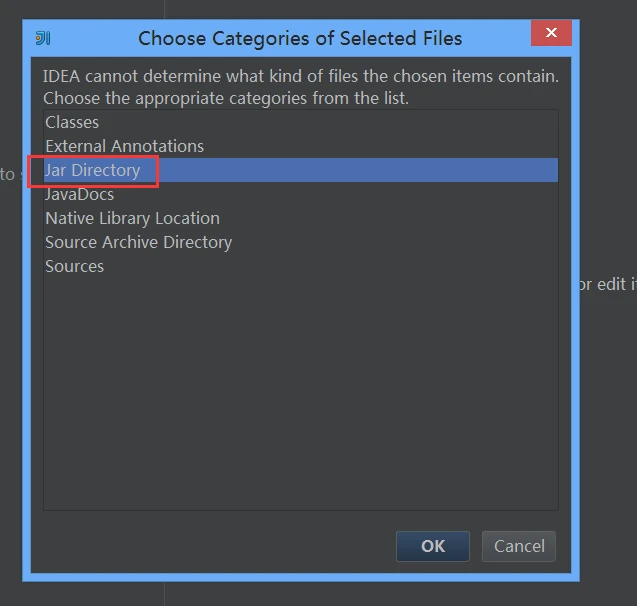
选择Dependencies,点击右边的加号,选择第一个jars and ……,选择上面创建的lib目录,点击OK,弹出框选择jar Directory,点击OK,点击下面OK,完成项目配置;
配置项目
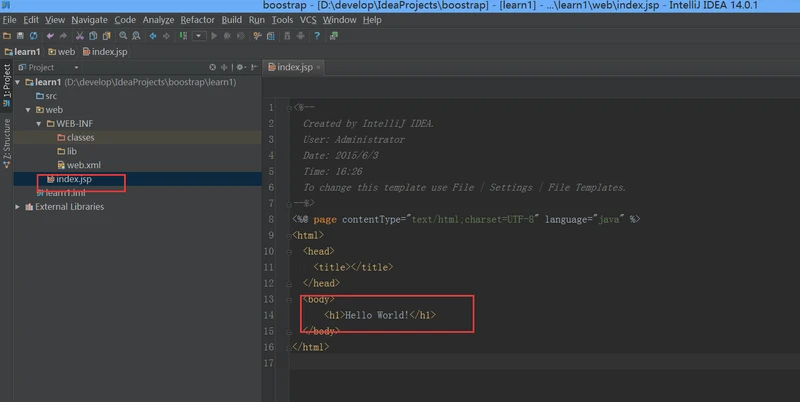
打开index.jsp,输入显示内容,比如“Hello World!”;
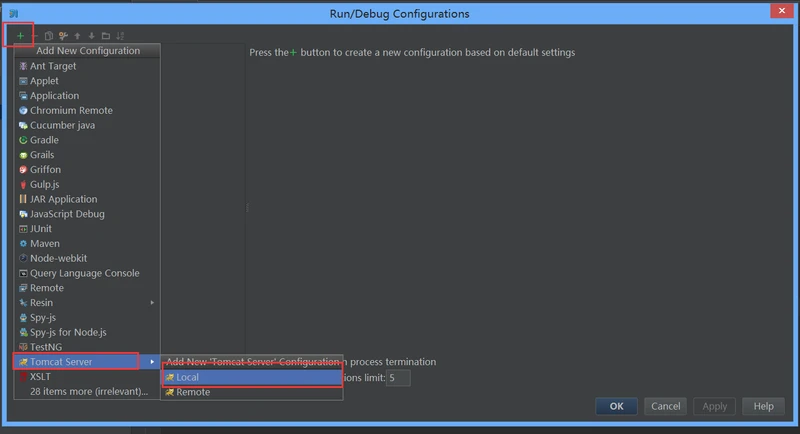
配置项目服务器;
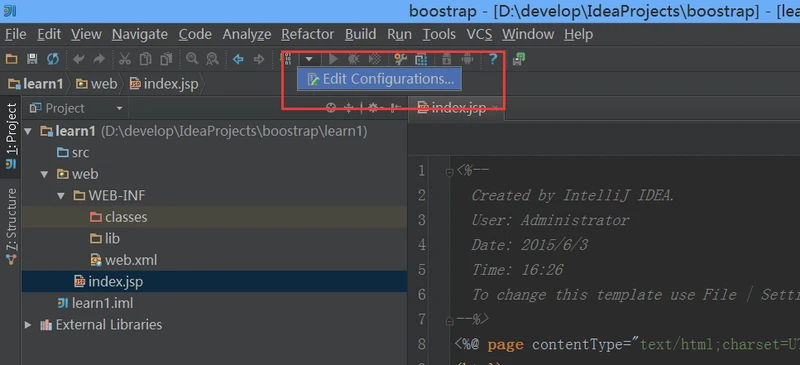
点击加号,选择tomcat server,选local;
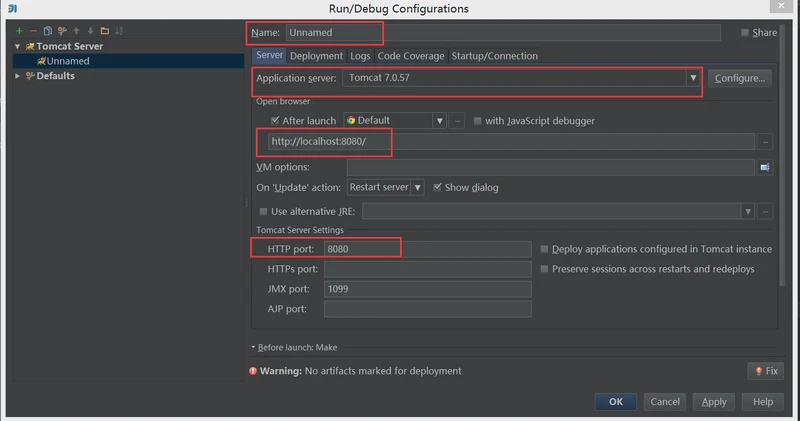
配置name、server、端口号;
选择Deployment,点击+号,选择上面配置的项目;
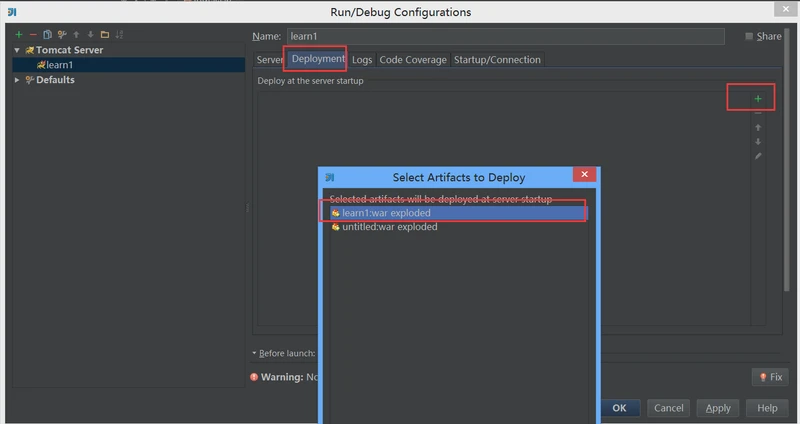
设置Application context,点击OK,完成tomcat配置;

启动项目
点击debug启动;
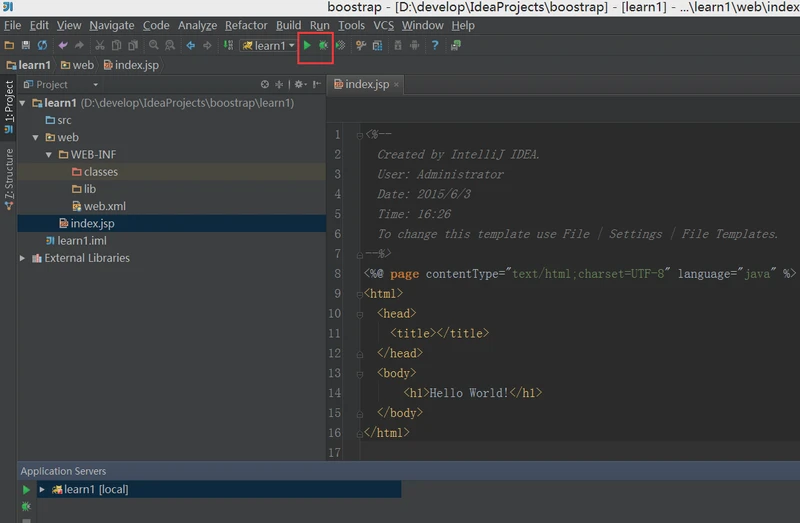
浏览器自动弹出index.jsp页面的内容,“Hello World!”;
自此完成整个项目的创建、配置与启动。